->Mijn blog verhuist; de nieuwe locatie van deze post is Studio Paars - DIY: haak een Granny Square telefoonhoesje
+=+=+=+=+=+=+=+=+=+=+=+=+=+
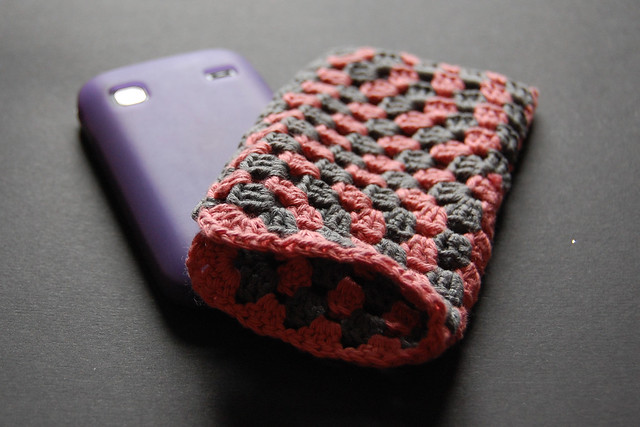
One of the workshops I am offering for my new business is "Crochet a Granny Square". So in order to refresh my skills and have an example at hand I made this phone cozy. It is super easy to make: all it takes is one single Granny Square! Here is a tutorial:
So you just crocheted your first Granny Square, but now what to do with it? A potholder is always an option ofcourse, but another one is to easily turn it into a phone cozy.
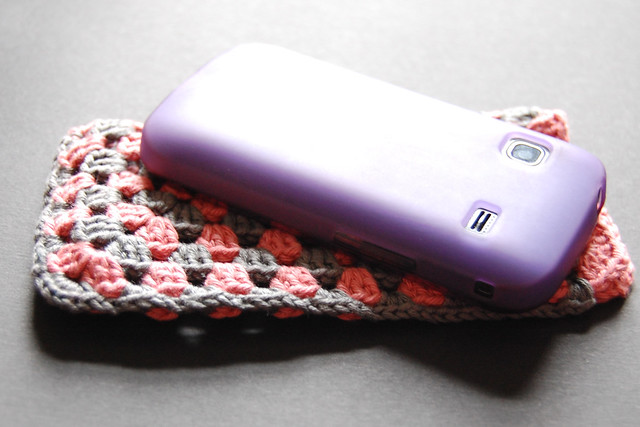
Step 1: crochet a basic Granny Square in the colours of your choice. Stop adding rounds when the square is just barely too small to wrap around your phone (for me this was after 9 rounds).
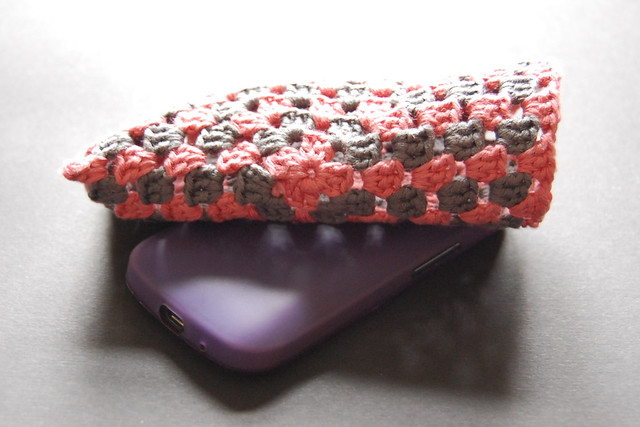
Step 2: fold the square in half and close it with crochet, starting at one of the folded corners. Single Crochet (sc) 3 into the gap between the clusters of stitches, taking care to make the stitches go through both layers. Chain Stitch (cs) 2 and repeat. When you reach the corner, sc 6 (with no extra cs in between), then repeat as before, alternating sc 3 and cs 2, until you reach the final gap at the side.
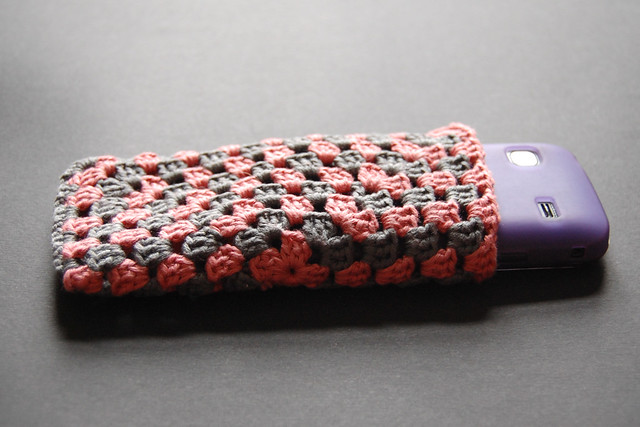
Step 3: weave in your ends and try the fit for your phone. If it's a bit too tight you can simply pull the cosy into the desired shape; if necessary, wet it before shaping and allow it to dry completely before trying it on again.
Eén van de workshops die ik aanbied voor mijn eigen bedrijf is een workshop "Granny Square haken". Dus om mijn eigen vaardigheden weer eens op te halen, en ook om een voorbeeldje bij de hand te hebben, haakte ik dit telefoonhoesje. Hij was super makkelijk te maken: er is maar één enkele Granny Square voor nodig! Hier is de tutorial:
Dus je hebt je eerste Granny Square gehaakt, maar wat doe je er nu mee? Een pannelap is één optie natuurlijk, maar je kan er ook heel gemakkelijk een telefoonhoesje van maken.
Stap 1: haak een Granny Square in de kleurtjes die je wilt. Stop met haken als het vierkant nog nét te klein is om om je telefoon heen te wikkelen (bij mij was dat na 9 toeren).
Stap 2: vouw het vierkant dubbel en haak hem dicht vanaf één van de dubbelgevouwen hoeken. Haak steeds 3 vasten in de opening tussen de segmentjes (let op dat je door beide lagen heen haakt) en dan 2 lossen. Wanneer je bij de hoek komt haak je 6 vasten (geen extra lossen voor de hoek). Daarna weer verder met steeds 3 vasten en 2 lossen, totdat je boven aan de zijkant in de laatste opening 3 vasten hebt gehaakt.
Stap 3: hecht je draden af en pas hem om je telefoon. Als het nog iets te strak zit kan je het hoesje wat in vorm trekken; eventueel eerst nat maken en na het in vorm trekken goed laten drogen.
linked at these parties:
Crafts A La Mode {What To Do Weekends} Handy Man Crafty Woman {Wicked Awesome Wednesday} Hope Studios {Tutorial Tuesday} Oombawka Design {Link And Share Wednesday} Organized 31 {Inspire Us Thursday Link Party} Organized 31 {This Is How We Roll} Seven Thirty Three {Inspire Me Wednesday} Snap Creativity {Show + Tell} The Answer Is Chocolate {BFF Open House Link Party} The Happy Scraps {The Creative Exchange Link Party} The Inspired Wren {Inspire Us Thursday} The Philosopher's Wife {Yarn Fanatic Party}
Crafts A La Mode {What To Do Weekends} Handy Man Crafty Woman {Wicked Awesome Wednesday} Hope Studios {Tutorial Tuesday} Oombawka Design {Link And Share Wednesday} Organized 31 {Inspire Us Thursday Link Party} Organized 31 {This Is How We Roll} Seven Thirty Three {Inspire Me Wednesday} Snap Creativity {Show + Tell} The Answer Is Chocolate {BFF Open House Link Party} The Happy Scraps {The Creative Exchange Link Party} The Inspired Wren {Inspire Us Thursday} The Philosopher's Wife {Yarn Fanatic Party}


Heel eenvoudig en toch heel mooi! Ik kreeg eind vorige week de armband in de brievenbus, ik maak er deze week nog een blogje over! Alvast bedankt, groetjes Sofie
ReplyDeleteAh gelukkig!
DeleteJij ook bedankt :)
Brilliant idea! A nice, easy project perfect for the beginner's attending your workshop and a great gift idea!
ReplyDeleteThank you for sharing at our Yarn Fanatic Party! And I hope you'll be by to party with us again.
#27 is live - http://eyeloveknots.blogspot.com/2015/03/yarn-fanatic-linky-party-27.html.
Alexandra
EyeLoveKnots.blogspot.com
Have shared on Facebook :)
DeleteThank you!
DeleteI was inspired by this post to work my own version. It can be seen here - http://eyeloveknots.blogspot.com/2015/06/granny-square-phone-cozy-free-crochet.html. Thanks for the inspiration!
ReplyDeleteAlexandra
EyeLoveKnots.blogspot.com
This complete Apna Showroom combo is all you need for home pooja, fashion updates, and baby care. Includes a Brass Kalash Lota with Gangajal, White Shivling, and Shaligram Shivling. The women’s ring set and rose clutcher add trendy style. On Page SEO website ranking Video SEO Expert - Ecommerce SEO Wordpress Shopify wix SEO Yoast Rank Math SEO Expert Off Page SEO Strategy and Rank on First Page Google Services on Fiverr Packages
ReplyDeleteAPNA SHOWROOM Feng Shui Crystal Tortoise | Turtle with Crystal Plate for Prosperity | 12X8cm | Set of 1
Apna Showroom Women's net Fishnet Lingerie Stockings - Fishnet stockings for women (Black Free Size) Pack of 2
Apna Showroom Baby Girl's Knee Length Frock skirts dress for 18-24 months 12-24 1-2 years baby girls birthday dress(Red_18-24 Months)
Apna Showroom Lice and Nits Removal Hair Comb for Women Apna Showroom Dressing Hair Comb for Men lice comb women lice removal comb lice comb plastic lice and nit removal comb ju wali comb lice comb for women, Kids, Girls, lice combs for Ladies And Women lice combs
Tic Tac clips help manage baby hairstyles. Cotton baby dresses, socks, and bloomers are breathable and gentle on skin. Whether for a religious event or daily use, this thoughtful combo brings happiness, harmony, and holistic care.
Helpful post
ReplyDeleteApp Developers