->I'm moving my blog; the new location of this post is Studio Paars - Hoops!
->Mijn blog verhuist; de nieuwe locatie van deze post is Studio Paars - Geborduurde (baby) naam
+=+=+=+=+=+=+=+=+=+=+=+=+=+
Hello little blog. I'm sorry for neglecting you.
I know I have been spending way too much time on Instagram lately. And also I've been crafting like a maniac, because in a few weeks I'm doing a craft fair!
Well, it's a tiny market really. I think. It's new so I have no idea how big it will be.
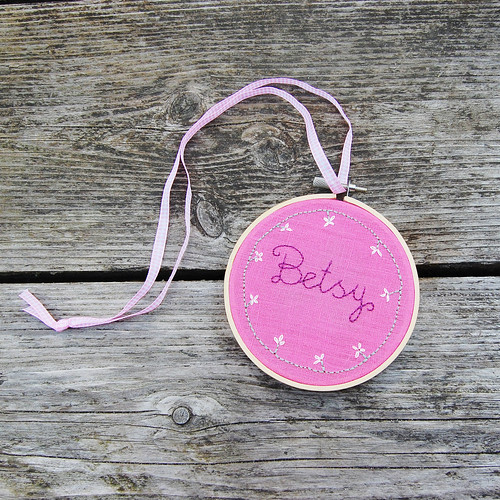
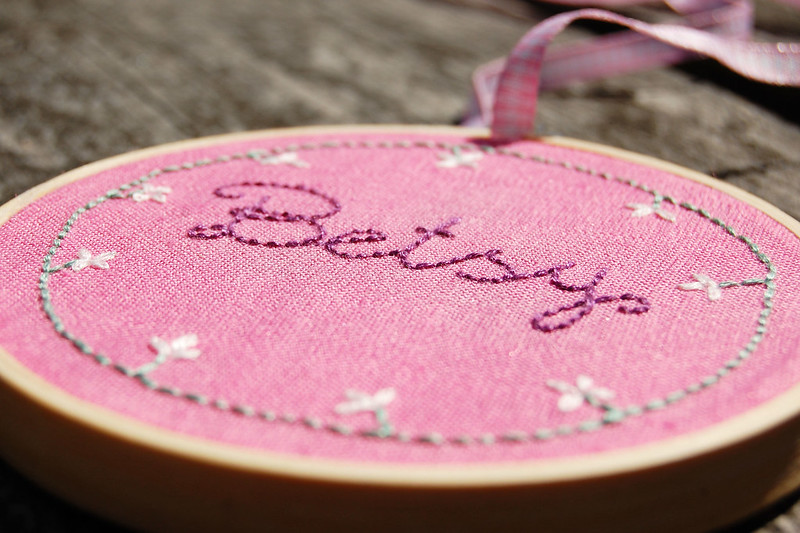
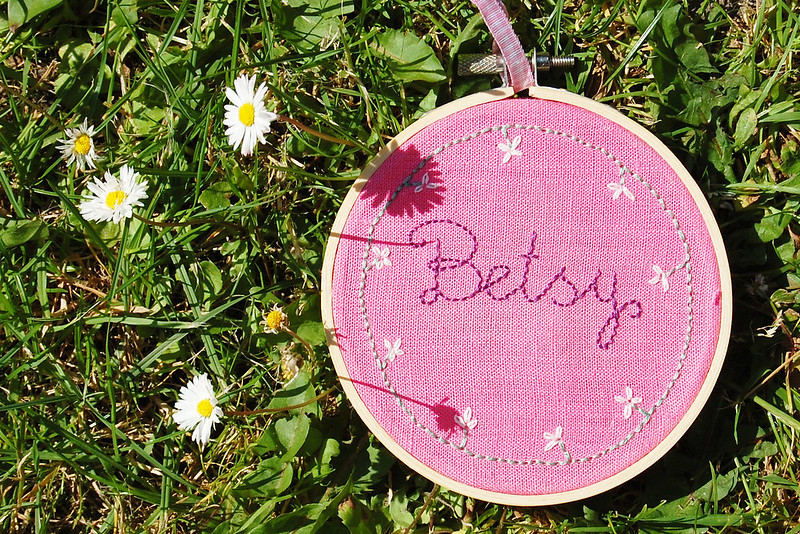
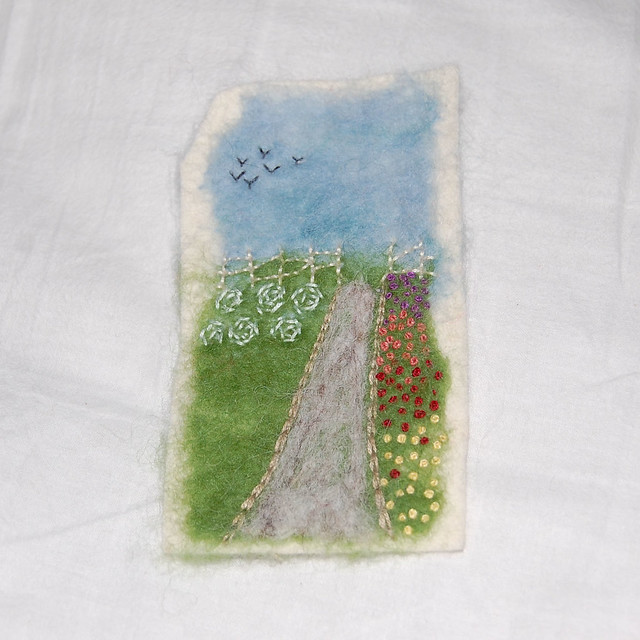
Anyway, just wanted to show a little something (the first of a lot more I hope) I made recently. I was seeing all the lovely embroidered hoops everywhere and after some doubts I finally started making my own. They are so much fun to make!
They would look lovely in any nursery and make the perfect personal gift for any parent-to-be, embroidered with the baby's name and (optional) date of birth etc.
I am now considering selling custom name hoops on my Etsy shop; not sure how to go about that though. Any tips?
Hallo! *zwaai* Lang niet gezien!
Ik breng veel te veel tijd door op Instagram...
Ook ben ik druk aan het maken voor een handmade marktje waar ik ga staan begin augustus (ben je op 9 augustus in de buurt van Zoetermeer? Kom dan kijken!)
Ik wilde in elk geval graag alvast deze laten zien: een voorbeeld van een custom borduurring met (baby) naam. Ik maak deze op aanvraag. Superleuk voor in de babykamer of als cadeau voor aanstaande ouders!
Ik wil ze gaan aanbieden in mijn Etsy shop maar ik weet niet precies hoe ik dat het best aan kan pakken; heb je misschien tips voor me?
Showing posts with label studio paars. Show all posts
July 23, 2015
June 4, 2015
* A fiber artsy finish
->I'm moving my blog; the new location of this post is Studio Paars - A fiber artsy finish
->Mijn blog verhuist; de nieuwe locatie van deze post is Studio Paars - “Fiber Art” experimentje
+=+=+=+=+=+=+=+=+=+=+=+=+=+
I finished this little fellow! (WIP photos here)
It started as a little experiment but I like the result so much I decided to frame it and hopefully someday it will get to be on display in my craft room. Imaginary craft room, that is.
I started with a little scrap of wool felt. I randomly placed some scrap wool roving and lightly needle felted it to the surface. It started to look like a landscape to me so I embroidered the birds and the fence. Then it started to become a garden so I embroidered the edges of the path and needle felted the natural wool to resemble gravel. Then came the french knot (or colonial knot; I don't remember) flower beds, and last came the vegetable patch.
I love it! I feel unreasonably proud of this little thing actually *grins*
I think the combination of techniques and materials worked really well. The needle felted wool has a slightly transparant look, not unlike watercolor. And the whole thing has great texture too.
The scale is a little off though; it's too big to be turned into a brooch and too small to be anything else. So I sewed it into a picture frame to make it easier to display.
I will be experimenting further with this. Maybe next time I will try adding fabric to the mix.
Deze is klaar! (WIP foto's hier)
Gemaakt met een restje wolvilt, wat restjes lontwol erover gelegd en lichtjes met de naald erop gevilt en vervolgens geborduurd.
->Mijn blog verhuist; de nieuwe locatie van deze post is Studio Paars - “Fiber Art” experimentje
+=+=+=+=+=+=+=+=+=+=+=+=+=+
![]() |
| Fiber Art Thingy |
I finished this little fellow! (WIP photos here)
It started as a little experiment but I like the result so much I decided to frame it and hopefully someday it will get to be on display in my craft room. Imaginary craft room, that is.
I started with a little scrap of wool felt. I randomly placed some scrap wool roving and lightly needle felted it to the surface. It started to look like a landscape to me so I embroidered the birds and the fence. Then it started to become a garden so I embroidered the edges of the path and needle felted the natural wool to resemble gravel. Then came the french knot (or colonial knot; I don't remember) flower beds, and last came the vegetable patch.
I love it! I feel unreasonably proud of this little thing actually *grins*
I think the combination of techniques and materials worked really well. The needle felted wool has a slightly transparant look, not unlike watercolor. And the whole thing has great texture too.
The scale is a little off though; it's too big to be turned into a brooch and too small to be anything else. So I sewed it into a picture frame to make it easier to display.
I will be experimenting further with this. Maybe next time I will try adding fabric to the mix.
Deze is klaar! (WIP foto's hier)
Gemaakt met een restje wolvilt, wat restjes lontwol erover gelegd en lichtjes met de naald erop gevilt en vervolgens geborduurd.
![]() |
| closeup |
![]() |
| detail |
![]() |
| detail |
![]() |
| texture |
![]() |
| layers |
linked at these parties:
Bee A Crafter XD {Crafting Along} ~ Oombawka Design {Link And Share Wednesday} ~ Wondermom Wannabe {This Is How We Roll Thursday} ~ Super Mom - No Cape! {Stitchery Link Party}
May 24, 2015
* DIY: vintage button necklace
I'm moving my blog; the new location of this post is: Studio Paars
Mijn blog verhuist; de nieuwe locatie van deze post is: Studio Paars
======================================================
A couple of days ago I posted this on Instagram:
Een paar dagen geleden liet ik dit zien op Instagram:
Een foto die is geplaatst door Audrey B. / Studio Paars (@audrey_studiopaars) op
Here is what I made that day:
Dit is wat ik maakte die dag:
Button necklaces!
They are really easy to make, and so much fun! You could easily make these with kids too. Just choose some pretty buttons and string them. I used waxed cotton cord in matching colors, but you could use yarn, linen, hemp or silk if you're feeling super fancy. The hardest part is choosing the buttons!
I used a mixture of new buttons and vintage ones. Some of those are quite old and I think some might be bakelite. They get to stand out now, instead of being buried in the bottom of my button jars.
Knopenkettingen!
Supermakkelijk te maken, en superleuk! Je kan ze makkelijk met kinderen maken, of gewoon zelf. Kies een paar mooie knopen en rijg ze aan een touwtje. Ik gebruikte katoenen waxkoord in bijpassende kleurtjes, maar je kan ook wol gebruiken, linnen of hennep koord of (als je echt heel chic wil doen) zijde. Het moeilijkste is om de knopen te kiezen!
Ik gebruikte vintage en nieuwe knopen door elkaar. Sommige zijn heel oud en ik denk dat er een paar van bakeliet tussen zitten. Nu stelen ze de show, in plaats van onderin mijn knopenpotten te blijven liggen.
I'm thinking of having a little givewaway for some of these. What do you think?
Ik denk erover om een giveaway te doen voor een paar van ze, wat denk jij?
linked at these parties:
A To Zebra Celebrations {Link Party Tuesday} ~ Bee A Crafter XD {Crafting Along} ~ Oombawka Design {Link And Share Wednesday} ~ The Dedicated House {Before & After Wednesday} ~ Wondermom Wannabe {This Is How We Roll Thursday}
April 10, 2015
* Random springy things
I'm moving my blog; the new location of this post is: Studio Paars
Mijn blog verhuist; de nieuwe locatie van deze post is: Studio Paars
======================================================
Today I was enjoying our first real day of spring after a long dreary grey winter by taking photographs outside of some lovely new washi tapes for my shop when I got distracted by all the Spring happening around me :)
Ook zo genoten van de eerste echte lentedag na die grijze grauwe winter? Ik ging lekker in de tuin foto's maken van wat nieuwe washi tapejes voor mijn winkeltje, maar raakte afgeleid door al het Lenterigs om me heen :)
linked at these parties:
Wondermom Wannabe {This Is How We Roll Thursday}
March 25, 2015
* WIP Wednesday - some knitting and some embroidery
I'm moving my blog; the new location of this post is: Studio Paars
Mijn blog verhuist; de nieuwe locatie van deze post is: Studio Paars
======================================================
Good morning! I finally managed to take some pictures this wednesday so I can actually show a couple of things I'm working on (or should be working on) .
First there is this little experiment. On a whim I needle felted some scrap wool roving to a piece of scrap wool felt to try embroidering over it. From there everything just came together as I was working on it, without having a clear image in my head. It's really wonderful when that happens.
I would love to finish it. I just need to find the time for a little more stitching.
Goedemorgen! Eindelijk heb ik eens wat foto's gemaakt zodat ik wat kan laten zien op deze WIP-woensdag.
Ten eerste dit kleine experimentje. Het is een restje wolvilt met daaroverheen wat restjes wol genaaldvilt, en daaroverheen weer geborduurd. Het ontstond terwijl ik ermee bezig was, zonder dat ik een duidelijk plan voor ogen had. Heerlijk is dat.
Ik zou het erg graag afmaken; nu alleen de tijd vinden voor nog wat steekjes.
Second is this Baktus scarf (the pattern is super simple and can be found here: http://www.flickr.com/photos/norwayneedles/2963651011/). I started knitting it in the fall, because for once I thought I'd knit myself a scarf before I actually needed it. The knitting was done in less than a week, but since I used scrap yarn there is a gazillion ends to weave in. So that's where I left it... all winter.
Dan deze Baktus sjaal (het patroon in supermakkelijk en staat hier: (http://www.flickr.com/photos/norwayneedles/2963651011/). Ik begon met breien in de herfst, zodat ik eindelijk eens een sjaal af zou hebben voordat ik hem daadwerkelijk nodig had. Ik was klaar met breien in minder dan een week, maar omdat ik restjes gebruikte zijn er een triljoen eindjes weg te werken. Dus daar ben ik gebleven... de hele winter.
March 13, 2015
* Friday's Thrifty Finds - some vintage pottery
I'm moving my blog; the new location of this post is: Studio Paars - Friday’s Thrifty Finds – some vintage pottery
Mijn blog verhuist; de nieuwe locatie van deze post is: Studio Paars - Friday’s Thrifty Finds – wat jaren 70 servies
======================================================
The husband and I both enjoy a nice thrift store or flea market once in a while, and today I took out some of my favorite vintage finds outside in the early spring sunshine (Finally! Our winter has been long and grey and dreary and frankly I'm sick of it).
The tray and the enamel coffee pot are my husband's finds; the cute little lidded jar and the 3 egg cups came from 2 different flea markets. The egg cups are printed with a very sweet blue flowers design (forget-me-nots maybe). I think we paid 25 cents for the jar and the egg cups were 10 cents each, positively a steal! Most thrift stores charge a lot more than this though; for the best finds (and with a bit of luck) I usually the prefer flea markets.
Unfortunately our boys have started complaining about all the thrifting...
De man en ik houden allebei wel van een kringloopje of een rommelmarkt zo nu en dan, en vandaag heb ik een paar van mijn favoriete vondsten eens even in het lentezonnetje gefotografeerd (Eindelijk! Die lange grijze rotwinter komt mijn neus uit!).
Het dienblaadje en de emaille koffiepot heeft de man gevonden; dat leuke kleine potje met deksel en de 3 eierdopjes komen van 2 verschillende rommelmarkten. De eierdopjes hebben een heel lief printje van blauwe bloemetjes (vergeetmenietjes denk ik). Ik geloof dat we 25 cent hebben betaald voor het potje en de eierdopjes waren 10 cent per stuk. Een koopje dus! De meeste kringlopen zijn een stuk duurder dan dit; ik vind rommelmarkten meestal leuker en met een beetje geluk vind je er de beste spullen.
Helaas klagen de jongens tegenwoordig als we weer eens willen gaan rommelmarkten...
linked at these parties:
Wondermom Wannabe {This Is How We Roll Thursday}
March 7, 2015
* Laptop bag (or sleeve)
I'm moving my blog; the new location of this post is: Studio Paars - Laptop bag (or sleeve)
Mijn blog verhuist; de nieuwe locatie van deze post is: Studio Paars - Laptoptas (of sleeve)
======================================================
Recently I made this laptop bag for myself. I'm calling it a prototype since making it was a real learning experience and I made several mistakes. But I do like the results: it's practical (I use it everyday) and I LOVE the fabric (Ikea).
To make it I just cut a large rectangle out of outer fabric, batting and lining. I sewed up the sides, finished the top with matching red bias tape, sewed a pocket onto the front and sewed on the strap. That's it, really.
If I make another one I will take photos along the way so that I can post a tutorial. I think anyone with basic sewing skills could whip up one of these within an hour or two in the fabric of choice and to the exact size of your laptop or other gadget.
Laatst heb ik voor mezelf een laptoptas gemaakt. Ik noem het een prototype omdat het maken ervan nogal een leerervaring was en ik een aantal fouten heb gemaakt. Maar toch ben ik tevreden met het resultaat: de tas is praktisch (ik gebruik 'm elke dag) en ik ben wild van het stofje (Ikea).
Om de tas te maken knipte ik simpelweg een rechthoek uit buitenstof, vulling en voering. Ik naaide de zijkanten vast, werkte de bovenkant af met bijpassend rode biasband,, naaide een zak op de voorkant en naaide de draagband erop. Dat was eigenlijk alles.
Als ik er nog één maak zal ik foto's maken van het proces zodat ik er een tutorial over kan posten. Ik denk dat iedereen met de basisvaardigheden van het naaien er eentje kan maken in een uurtje of twee, in de stof naar keuze en perfect passend voor je eigen laptop of andere gadget.
Someone needed to inspect...
Iemand moest even de boel inspecteren...
And outside the signs of spring were everywhere. I couldn't resist taking some pics.
En buiten was overal de lente al te zien. Ik kon het niet weerstaan wat foto's te nemen.
linked at these parties:
A To Zebra Celebrations {Link Party Tuesday} ~ Blossom Heart Quilts {Sew Cute Tuesday} ~ ChrisW Designs {Bag Brag Tuesday} ~ Creative Jewish Mom {Craft Schooling Sunday} ~ Fort Worth Fabric Studio {Fabric Frenzy Friday} ~ I Have To Say... {Show And Tell Tuesday} ~ My Quilt Infatuation {Needle and Thread Thursday } ~ Quilt Story {Fabric Tuesday} ~ Sew Can She {Show Off Saturday} ~ Straight Grain {Sew + Show} ~ Threading My Way {Threading Your Way} ~ Wondermom Wannabe {This Is How We Roll Thursday}
Subscribe to:
Posts (Atom)


